How To Draw A Foot
Learn to draw feet
If you want to learn how to draw people and go deeper into act painting, you might ask the question: How to draw a feet?
In this drawing tutorial, I will try to give some answers to this question and show you a few helpful tricks.
Learn to draw feet
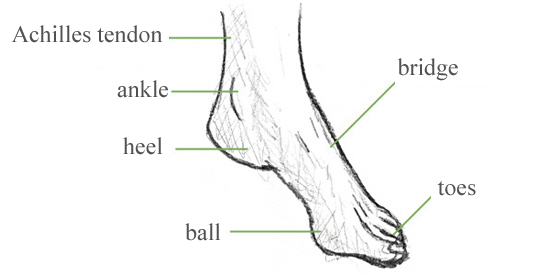
The most important parts of a foot are the heel, the toes, the bridge, the ball, the Achilles tendon and the ankle. The picture below shows a foot with its elements.

The most important parts of a foot
Draw a foot in a side view
A first and easy exercise to draw feet is to draw the foot in the side view. There are different methods and approaches for this. In this drawing I will use the method of decomposition into geometric bodies. A foot can be divided into circles, which are then connected with lines. You can see how this is done in the following drawing.
I have divided the foot into three circles representing the heel, the toes, and the ball. The circles become smaller and smaller along an oblique line (drawn in green). With a few lines the foot sole, the back of the foot, the Achilles tendon and the shinbone are marked.
.jpg)
graphical decomposition of a foot
If you want to learn how to draw feet, you can take three simple steps:
1. Graphical decomposition into simple geometric bodies - as described above.
2. Rounding the intersections of circles and lines.
3. Detailing and erasing the superfluous lines
The following drawing illustrates this exercise:
.jpg)
Learning to draw feet in three steps
Learning to draw the sole of a foot
Now let's look at the underside of the foot - the sole of the foot. Drawing is very important as it helps us to understand the shape of your feet better, and that helps us in drawing your feet in other postures and other perspectives.
Here, too, we proceed in three steps:
- Sketching of the feet with simple geometric bodies = circles, ellipses, and lines
- Rounding the interfaces of these bodies and lines
- Detailing, correcting and erasing superfluous lines
.jpg)
sole of a feet draw in three steps
Help drawing the proportions
The decomposition of the foot into geometrical bodies, however, does not quite solve the problem of correctly drawing the proportions of the foot. For this I would like to give you a few tips on the way.
One can divide the foot, as viewed from below, into five parts. Each part is thus 1/5 long:
- Part 1 = Toes (more specifically the Big Toe and the following one)
- Part 2 = Football
- Part 3 + 4 = metatarsal (between the football and the heel)
- Part 5 = heel
.jpg)
illustration of correct proportions of a foot
Draw a foot from behind
When you draw act studies you sooner or later enter the situation that you have to draw feet from a perspective from behind. The previous drawing methods and exercises do not help here much further. Therefore I would like to give a few tips for this case.
Looking at feet from behind, one looks at the Achilles' tendon, ankle and heel. You have to make sure that the Achilles tendon is relatively thin – at least thinner than the rest of the foot - so you can still see the ankles of the foot.
.jpg)
Drawing left foot from behind
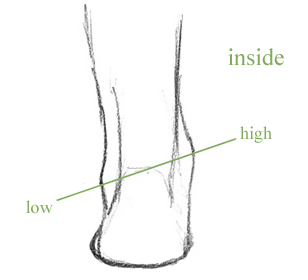
When drawing the ankle, make sure that the ankle on the inside of the foot is slightly higher than on the outer side. The following picture shows the anatomy.

Drawing foot from behind
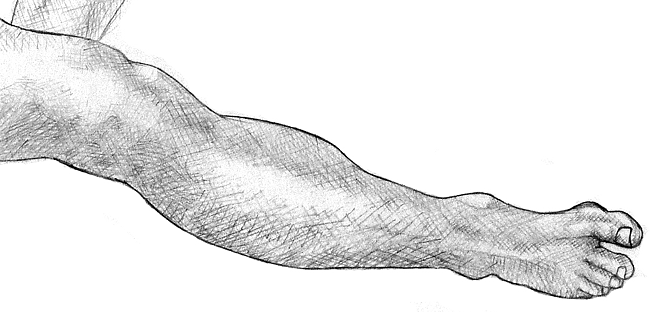
Here are a few drawings of feet from other perspectives. And other attitudes. But as already said - more in the next guides.
.jpg)

With these tips on drawing feet and a bit of practice, simple act studies should be an easy task. There are many more tips and things to consider, but more in a following guide.
How To Draw A Foot
Source: https://www.art-class.net/06-tutorials/figures/draw-feet.php
Posted by: casnerwherted.blogspot.com

0 Response to "How To Draw A Foot"
Post a Comment