

How To Make Soft Pastels
Disclosure: Please note, that when you click certain links and purchase certain items through my Website , I will receive a referral commission. You can learn more by following this link. Thanks for your support!
About Phyllis Russell Franklin

Phyllis has always painted. From her earliest memory she recalls how much she enjoyed the play of color and the creative process of all visual arts. During her childhood years she found many creative ways to fill that need to make things beautiful by playing with house paints creating many paintings that are still in her family today. She always looked for ways to "color" things and even went so far as to make her own dyes from seeds and plants for fabrics and other creative projects.
Working in the corporate world for some 30 years and taking care of her family left little time for exploring and developing her artistic talents. After retiring she has enjoyed and put to good use the time she has each day to learn and grow as a fine arts painter. She says "It's such a pleasure to be able to have an opportunity to enjoy a second career and for it to be one that you actually get up each day wanting to do. I particularly enjoy painting outside doing small color studies and then bringing those studies back to the studio to use as memory maps for larger paintings. I am thankful each day for the life and talent God has given me and for the opportunity to share my paintings with others"…
Please follow this link to learn more about Phyllis and to view her work
Making Soft Pastels by Hand
Making soft pastels is a time-consuming messy job but well worth all the trouble when you are successful making that one special color that you have not been able to find anywhere else. You can create your own custom pastel sizes that fit your hand and the techniques you like to use. Not only that, you learn a great deal about color during the process and can make them cheaper than buying commercial pastel crayons.
Another advantage of being able to make pastels is that you can make your pastels as soft or as hard as you would like them to be. Commercial pastels have to be made hard enough to withstand breakage during shipment. Because you do not have to concern yourself with shipping you can make softer pastels that are more yielding and do not dig into the under-layers as much as the harder pastels do. The paint quality will be richer, and the colors more intense. The softer the pastel, the easier it is to make thick layers of color. Light colors can be applied with real impasto effects, which are especially brilliant with soft pastels.
Knowing what goes into your pastels is another advantage. You can be the quality control technician. Use the best ingredients available, and only proven permanent pigments, safe binder, and preservatives to prevent mold. Keep your supplies and tools clean to prevent trash contamination.
Gather your supplies and let's begin.
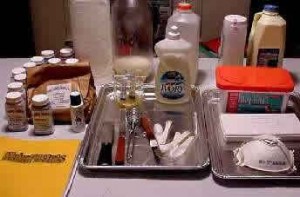
Here are a few suggestions:
- Old Clothes to wear, plastic table cloth
- Dust Mask, disposable gloves
- Notebook for formulas and adjustments
- Glass or non-stick Work surface
- Measuring Spoons and cup, spatula, 1/2 tsp. & 1 drop graded dispenser
- Ivory Clear dishwashing detergent, water
- Pigments, and precipitated chalk
- Putty knife, (forming knives are nice)
- Sponges, paper towels, babywipes, 409
- Storage bottles for binding solutions
- Dry pigments, Binder, preservative
- Newspaper, plastic wrap
- A bucket half full of water for clean up and rinsing off the tools.
- A sense of humor!
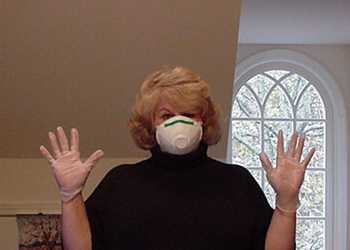
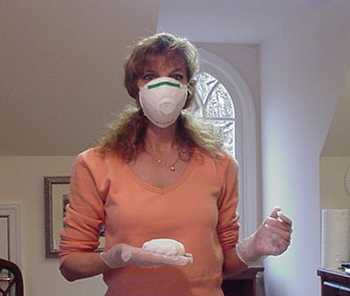
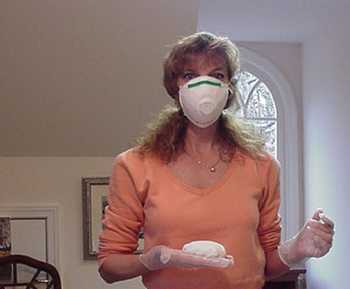
You will notice as you go through this article that none of us have on eye protection, or aprons. When working for an extended period of time, it is advisable to protect yourself to the upper most degree. Better to be over protected and uncomfortable now than under protected and be sorry later. We did use extreme care to not touch the pigments with our bare hands, or create dust as we mixed our pigments. We also worked a very short time.
Here are a few precautions for your consideration that are particular to pastel making. As always, all safety measures should be followed using any materials, art related or not. Common sense will guide you with this.
When working with dry pigments, wear a dust mask and protect all exposed skin from dust particles as best as you can. Use protective skin cream before you begin work. Check with your art supply dealers for different types.
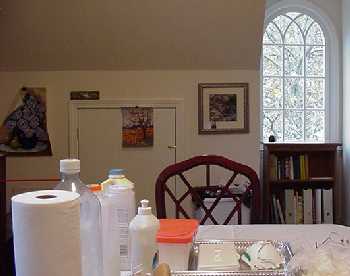
Do not eat, drink, or smoke in the studio. Although these pictures look like a kitchen scene, this is, in-fact a studio equipped with a large sink for clean up and a large table covered with a new white plastic shower curtain. The shower curtain can be taken outside to remove any dust, and then washed to be used again.
Keep the studio clean. After your session with pastel making or working with your new pastels, clean the studio with a vacuum. Wear your dust mask while doing this. Do not blow the pastel dust off anything!
Safety First in Everything!
If you have further questions about health concerns, I suggest you check with your local health department as well as books especially written for artists about health issues.
To begin you will need supplies to make a binding solution. Gum tragacanth is the most acceptable and widely used binder. It is a dry powder that is derived from the astragalus gummifer shrub and other related family plants found throughout SE Europe and W Asia. It is obtained through incisions in the stem of the plant. The gum, which is chiefly produced in Iran, is almost insoluble in water, but swells in it to form a stiff gel. Among it's many uses are found emulsifying agents, components of pills, hand lotions, medicinal lubricating jellies, as a demulcent, and as a sizing material. Binders other than gum tragacanth have been tried. Others have used such materials as honey, starch, soapy water, brandy, and more recently methyl cellulose wallpaper paste. The biggest advantage of using tragacanth is the pastels don't stick to your hands as much.

Because this binder is susceptible to mildew,you will need a preservative solution to put in your binder. For this workshop, we used gum tragacanth with preservative premixed by Terry Ludwig which was a great deal easier. All supplies can be ordered by contacting Terry Ludwig at https://www.makepastels.com or from most large art supply houses such as Dick Blick. Also try Robert Doak, Kremer and Studio Products for some or all of the materials needed.
Because each pigment has unique properties that react differently, the first step is to make binding solutions in different strengths to accommodate these differences. If you don't use supplies from Terry, use the scratch formulas below. These scratch formulas were collected from other pastel artist friends as well as from noted reference material. As mentioned above, we did not use the scratch formulas in this workshop, but rather relied on materials supplied by Terry Ludwig which solved a lot of the problems for us.
From Scratch Formulas:
Preservative Solution
Lukewarm water: 5 quarts + 2 level teaspoons of *sodium orthophenyl phenate
Or, small amounts of a weak solution of phenol [carbolic acid], about a half teaspoon of the 1 percent solution ot a pint of distilled water can be used as the mold preventive-perservative. Drugstores will generally sell it up to about a 5 percent solution, this low concentration being deemed harmless.
*Sodium Orthophenyl phenate [trademark "Dowicide A"] is a powder obtainable in chemical supply stores. Small amounts [1/4 teaspoon to a quart of binding solution] will effectively perserve gums.
This solution can also be used directly on your pastel support if you have a problem with mildew. Experiment with using this solutions on your papers. Remember to let the solution completely dry before you begin your painting.
Solution A
48 Fluid Ounces of Preservative solution
2 level tablespoons gum tragacanth
Note: Gum Tragacanth does not dissolve easily so to encourage the process warm the distilled water when you make your preservative solution then add a couple of drops of any clear dishwashing detergent. Make sure you do not boil your water because it may destroy the preservative.
Solution B
8 Fluid Ounces of preservative solution
8 Fluid Ounces of Solution A
Solution C
24 Fluid Ounces of Preservative solution
8 Fluid Ounces of Solution A
Solution D
24 Fluid Ounces of Preservative solution
4 Fluid Ounces of Solution A
Solution E
24 Fluid Ounces of Preservative solution
2 Fluid Ounces of Solution A
Directions:
Make up the solutions and store in bottles that you have labeled as Solution A-E and Preservative Solution. ( 6 bottles) When you make solution A, which is the mother for all the other solutions, let the mixture soak about twenty-four hours in a warm place while a gel forms on the top. Then whisk the solution until the gel and water become one. If you put this into an old soda bottle, you can gently mix by moving the bottle gently from side to side. Place a cap on the bottle for storage. There may still be some traces of gum or preservative that are not yet absorbed but this is nothing to worry about.
The strength of the binding solution is what determines the softness of the pastel. Here are a few general guidelines for using the solutions.
Solution A: Cadmium red, cadmium yellow, cadmium orange, alizarin crimson
Solution B: Cerulean blue
Solution C: Precipitated chalk, titanium white, zinc white, ivory black, viridian, phthalo blue, ultramarine blue, cobalt blue, Mars violet, chromium green oxide
Solution D: Raw sienna, yellow ochre, Indian red, Prussian blue
Solution E: Burnt Umber, raw umber
Preservation solution Alone: Burnt sienna, terre verte
These formulas have not been tested, but are found in an excellent book by Alan Flattman, "The Art of Pastel Painting", Watson Guptill. This book is out of print, but you might find one ocassionally on e-Bay.Additonal information was collected from Ralph Mayer's book "The Artist's Handbook of Materials and Techniques", Viking Press.
Good lighting helps
Remember to label those bottles. Keep your trash can handy and try to work as clean and as organized as you can.
Steps to Success
White Starter Paste and White Chalk
Start by grinding
3 parts precipitated chalk
1 part Titanium Dioxide pigment
and a little solution C
12 Tablespoons chalk
4 Tablespoons Titanium Dioxide
Solution C a teaspoon at the time until a paste forms. (15-20 teaspoons)
Experiment here with the amount of Titanium Dioxide you use, especially if you want to use the white paste as your white pastel chalks. Terry Ludwig tells us that you will need a stronger Titanium Dioxide for the plain white chalks.
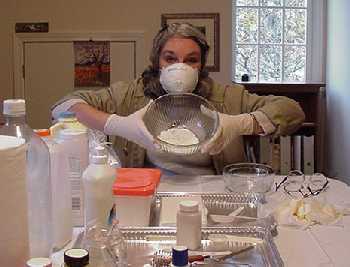
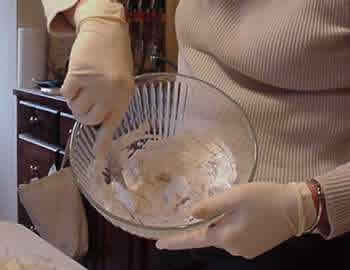
Use a bowl or a flat non-porous surface like glass to mix these ingredients. Mix chalk and pigment dry before adding solution C.
Adjust the mixture with solution C or chalk to form a paste that is the consistency of play dough.
Set this mixture aside. Some will be used as pure white pastel sticks and some used as paste to make color graduations with other pigments. Adjust the amount of Titanium Dioxide in the mixture that you use for plain white chalks.
Deb would like to remind you to think safety first when working with pigments.
Divide the dough ball into smaller pieces and set aside about two thirds of the pieces to be used as white paste stock.
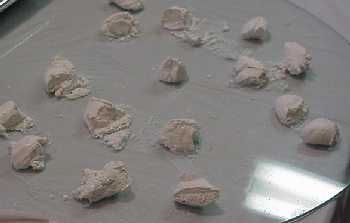
Take the other third and shape the dough into pastel sticks.
Lay the white pastel sticks you have made on news print for an hour or two so that the newsprint can absorb excess moisture.
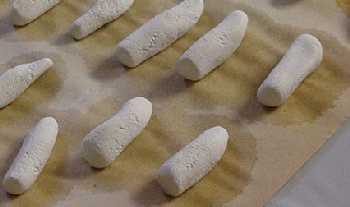
Transfer the pastel sticks to plastic wrap that has been wrinkled. The plastic wrap will keep the pigments from cracking as they dry completely. The pastel sticks should be ready to use within the next day or two. You can test the sticks to see if they are dry by touching them. If they are cool to the touch, they are not dry. Dry pastel sticks do not feel cool.
If you need them in a hurry you can try putting them in the oven at 150° F. This way you can test them for the desired softness and if you need to adjust you can. If the color takes easily to a surface, the binder is right, but if your pastel crumbles during drying or breaks under slight pressure, it needs a stronger binder. If the color does not take easily to a surface, the pastel is too hard and a weaker binder is needed. You need to experiment here because some earth colors like terre verte or burnt sienna tend to dry too hard even when they are ground in plain water. However, when they are mixed with a small amount of chalk or black pigment, they become very soft and lay down well.
Keep notes and you will become an expert.
Custom Color
Start with a clean glass surface or other non-porous work surface.

Choose your working pigment. Refer to your formula recipes and your notes always.
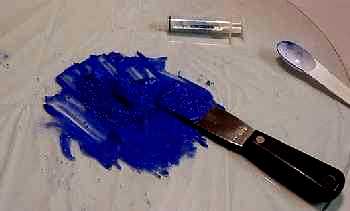
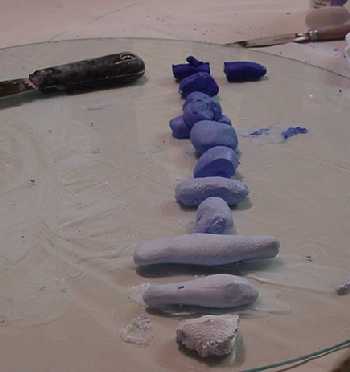
Measure out the pigment to be used. In this example we are using 2 oz of Ultramarine Blue.
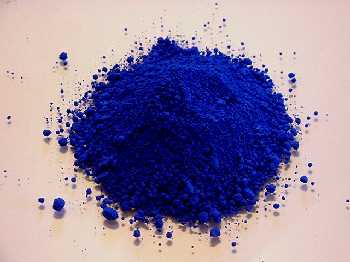
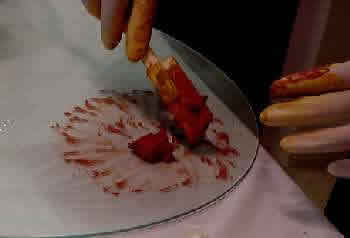
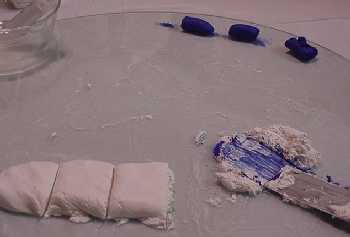
Add a sufficient amount of Solution C. Keep adding the binding solution C by teaspoons until the paste is of the consistency that is dry enough to keep it from adhering to the fingers. Use your putty knife to grind the paste into a smooth cake and then slice the cake into portions to be used as Ultramarine blue pastel sticks and then some to be used to make custom tints or shades.

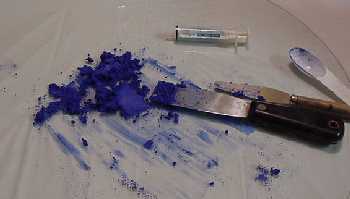
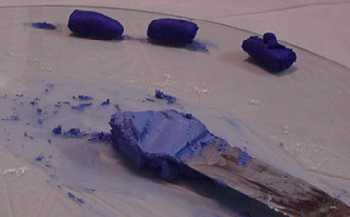
Use the putty knife to grind the pigment into the paste.
Finally, the mixture becomes a paste that can be formed into a pastel stick.
Make notes of your mistakes/adjustments.
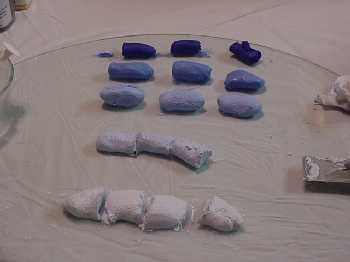
Roll the paste into a manageable size and make your pastel in the shape and size you would like.
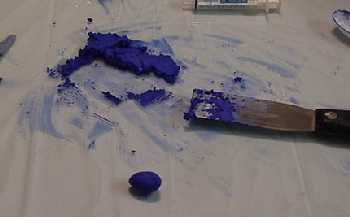
Here I just made a long rope of the pastel paste and cut it into four pieces.
Taking one of the four pieces of my final pastel roll, I begin to mix another custom color by adding white paste.
Continue to grind and mold the paste until you get the mixture completely smooth.
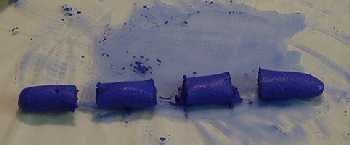
Now roll your new custom color into a long pastel log and cut into four pieces.
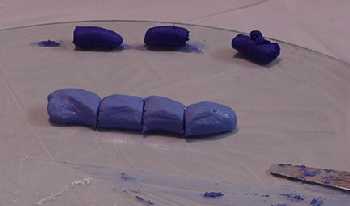
Set three of them aside.
Taking the one custom piece, mix with one of the premade pure white pastel log pieces. You now are going to make another custom color that will be a lighter version of the other two you have already made.
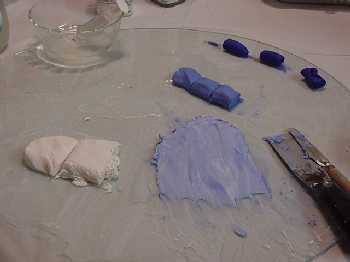
Use the putty knife again to smooth the mix and forum your new custom pastel color log.
Once again, roll your new custom color into a log and reserve three of the pieces. Take one piece and add it to the last premix white paste.
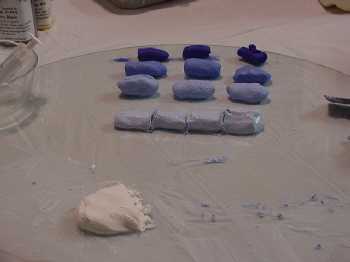
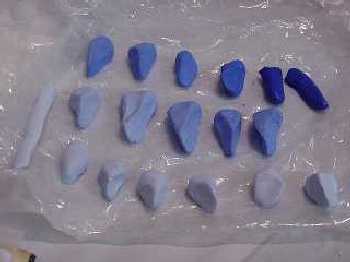
What you end up with is 5 value tints of your color.
Of course, this is using one pigment color and then using white to make tints.
You can and should use color pigments to grade your custom colors as well. By mixing different pigments together you can make different shades to work with and then create tints from your new custom shades.
To take the mixture further with more tints, just mix your custom colors with the next darkest or lightest tint and make an in-between custom color.
Experiment also with using black paste in place of the white paste. This will produce darker shades of your original pigment colors. Remember to keep notes on all the different pigments you mix together and what measurement you used. Then you can make that same color again and again.
This photograph is showing all the color tints that have been made.
Now it is time to make them into the shapes and sizes that you want.
Lay them on absorbent paper until some of the moisture has been absorbed then move to wrinkled plastic wrap to dry. Or…you can move them to the oven as previously stated.
Store your new custom pastels in boxes that are lined with foam, or use pre-made boxes that you can buy from art supply houses.
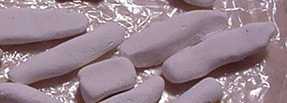
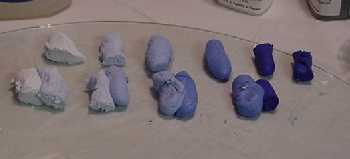
Photograph is of finished pastels made in various shapes for various techniques.
I tend to like the triangle shape that I have learned to make. It gives me edges that I like and also fits in my fingers well.
Note that the pastels are drying on a wrinkled plastic sack. When the pastels have completely dried, they will be slightly lighter in color than they are when they are wet.
Remember, you are the artist here, make your own custom colors and experiment. When you do, send in an image file of your work, along with your name, and we would be honored to include it on a special page attached to this article.
Share your color recipe. You may discover a pastel color recipe that all of us would enjoy having.
Send to phyllisfranklin@hotmail.com
Learning to make pastels was fun. Many thanks to Terry Ludwig, Don Jusko, Rob Howard and many other pastel artist friends that wish to remain nameless who helped with technical information on these pages. Look for more articles about making pastels soon.
The Making Homemade Pastels Workshop was a big success!
How To Make Soft Pastels
Source: https://www.artinstructionblog.com/how-to-make-soft-pastels-by-hand
Posted by: casnerwherted.blogspot.com
0 Response to "How To Make Soft Pastels"
Post a Comment