

How To Draw Dripping Effect
GIMP Text Effects Tutorial {Drip Effect}
In today's GIMP text effects tutorial, you'll discover how to make pixels drip like paint!
This tutorial includes, but not limited to, clipping an image to text, creating a canvas-like background, mixing "paint," and, of course, making your paint drip down your canvas.
Are you ready? Awesome! Let's do it…
Table of Contents
Step 1: Create a New Document
For this project, I will use the following dimensions; 1920 x 1080 @ 300 ppi. Change your Foreground color to the following hexadecimal number (minus the pound sign); #f0ecdb.
Make sure the "Fill with:" is set to Foreground color and click OK.

Pro Tip:
Why a resolution of 300 ppi?
The reason is simple. GIMP software is 100% raster-based (i.e., pixel-based). At lower resolutions, the text is not as sharp as in other software like; Photoshop, Affinity Design, and Illustrator.
Even if I'm working on a design project that will be mostly for online use, I will still use a resolution of 300.
Then, when I'm ready to post online, I will resize the canvas to a resolution of 72 ppi.
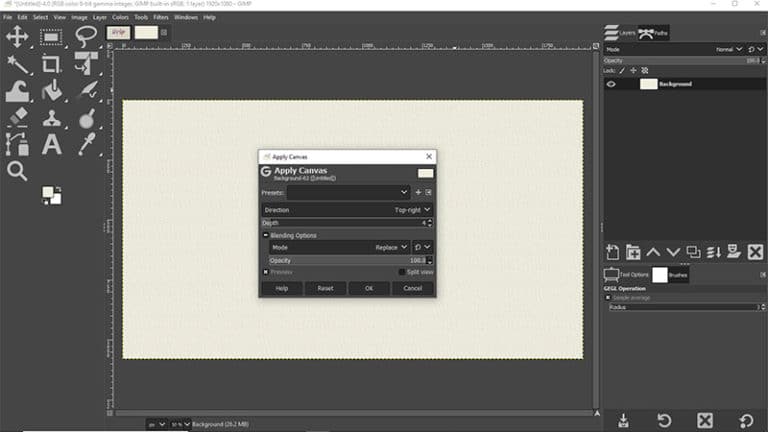
Step 2: Add Texture To Your Background Layer
Let's start off by creating a canvas-like texture.
Filters > Artistic > Apply Canvas
For this design project, I'm leaving the default settings for this filter. Click OK, and you'll now have your canvas texture applied to the background layer.
Step 3: Add Text + Align
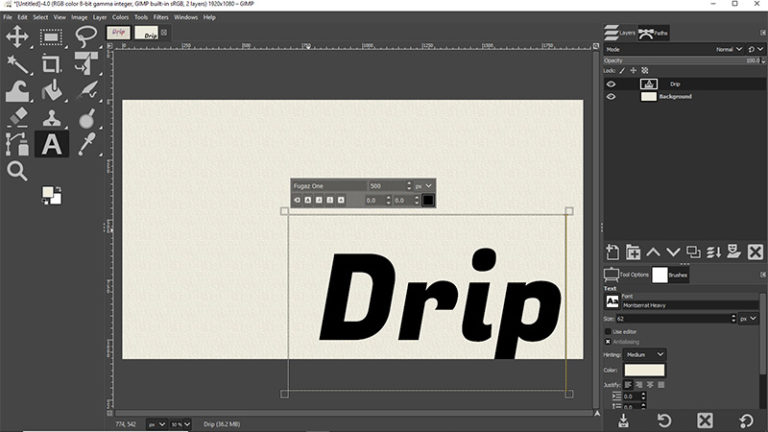
Let's grab our text tool from the toolbar or press the letter "T." For the font type, I'm using a free Google font called Fugaz One. The font size I'll set to 500 and black for the font color.
As for alignment, I will manually move the text layer up a little bit and eyeball the center. Hit your escape key to deactivate the text box. Then, with your move tool ("M"), move it into place…
Step 4: Add Image & Clip It To the Text

For this project, I located an image you can download and use from Pexels. I picked this particular image for its colorful sky. Multiple colors allow for a more creative edit!
Once downloaded, grab the file from your system folder and drag it over the GIMP interface. Once you release your mouse button, the file will be added as a new layer. The image layer should be the top layer. If not, click and drag the layer up.
Next, click on the text layer to select it and then right-click on it. From the new menu, click on "Alpha to Selection." This will auto select each individual letter.
Note: If needed, reposition the image layer, so only the sky is inside the letters.
Select your image layer again, right-click on it, and select Add Alpha Channel. The next step involves inverting your selection…
Select > Invert
Then, hit your Delete key or Backspace key. Boom! Your image is now inside your text. How cool is that? I love it!
Let's deselect now with Shift + Ctrl or Command + A. Also, you no longer need the original text layer. Either move to the bottom or delete it.
Step 5: Mix the Colors + Drip Effect
Pro Tip:
For this effect to work you'll need to adjust the "drip" layers "Layer Boundary" size.
Layer > Layer to Image Size
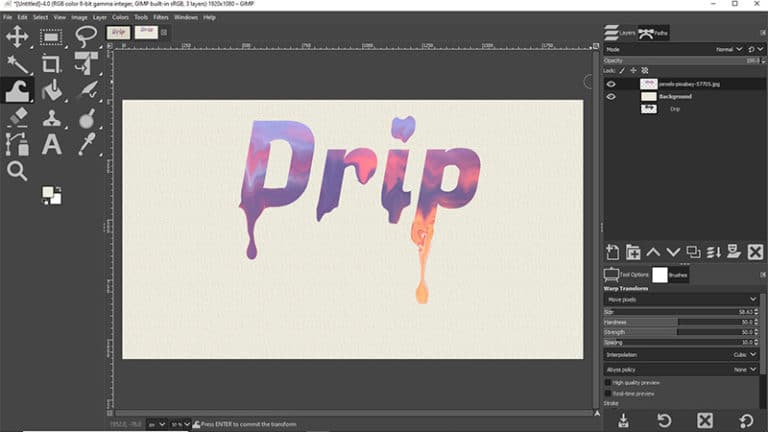
Now the fun begins! It's time to mix our paint and make it drip. This effect will be achieved with the Warp tool. Locate it on your toolbar or click the letter "W."
The Warp tool works just like a regular brush. Check out your tool options, and you'll see the same types of settings. Adjust them as needed. Mostly, you'll be working with the size to get the effect you're after.
For this project, I'm going to start off with a small brush of around 60. That way, the brush will fit on the inside of the letters.
Now, begin painting inside those letters, and the colors will start to mix!
To create a drip, drag the Warp tool on the outside of the letter. You can push down the drip as far as you like. To make a teardrop, use a smaller brush to fit inside the drip and push out on all sides until you have an oval shape.
Push the teardrop from outside in to resize it smaller… and make the top part of the drip thinner.
Now it's your turn to…
Action Is Power
…complete this text design project. And I'd like to see your design too. Here's how…
Head on over to our community and post your text effects project. I'll answer any of your questions. Also, if you want feedback, add #CC.
Before you go, check out my GIMP text effects playlist with over 20 more GIMP tutorials.
Using GIMP can be challenging when you're new to the software. If you'd like to master GIMP with less frustration, check out my GIMP Made Easy tutorials.
You can also click here to find all my free articles on GIMP.
Would you like to see how to process this design in Photoshop? If so, check out the Photoshop videos tutorial and article.
Like this article? If so, please share!
How To Draw Dripping Effect
Source: https://parkerphotographic.com/gimp-text-effects-tutorial-drip/
Posted by: casnerwherted.blogspot.com
0 Response to "How To Draw Dripping Effect"
Post a Comment